
Mobile Xcode Projects
Xcode: First App Test: Bullseye
23/01/18 15:51
Xcode: First App Test: Bullseye
I recently started a self taught course in IOS Development in order to get to grips with the fundamental structure of swift language, Xcode ’s tools and make the final translation of getting my app on devices and the Apple store.
After getting an introduction to Xcode and Swift I have managed to produce a simple slider app called Bulleye.
The next step is to knock down the core area of swift code itself.
The end result of the app is shown in figures 1-3 below.
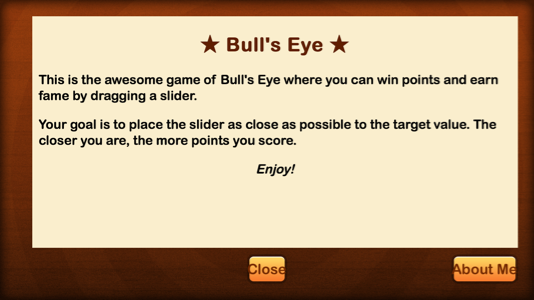
Figure 1: Bullseye App instructions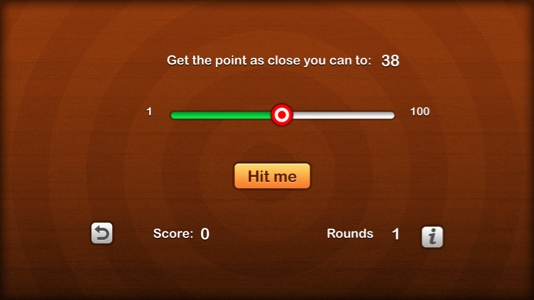
Figure 2: Bullseye Game Interface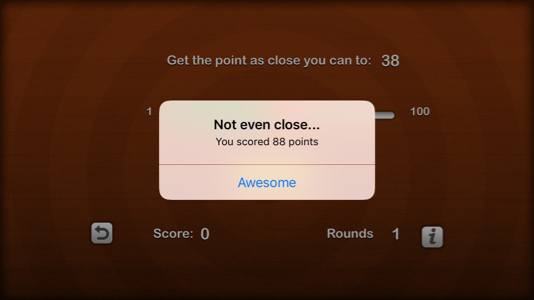
Figure 3: Bullseye: Points based on the distance to the target
App Research: Maps
21/02/17 18:14
App Research: Maps
At the moment I am researching on a app. Its all speculation but at the moment the idea might involve using maps and maybe eventually GPS or Augmented reality.
In order to understand GPS, I decided to experiment with Map view kit.
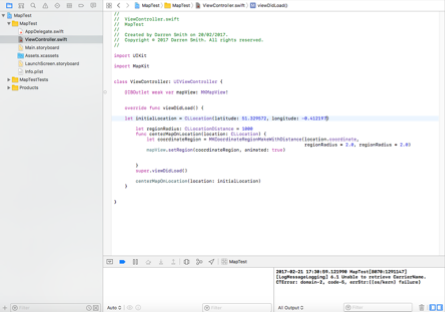
Figure 1: Map View Kit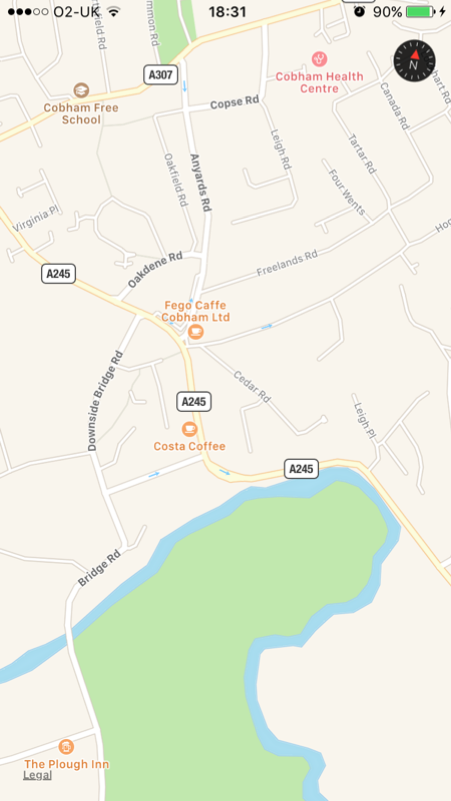
Figure 2: Map View Kit viewing the area
Xcode: Making a Food Tracker App
24/01/17 16:22
Building a Basic Food Tracker app
To get familiar and retain my skills with Xcode for writing apps I will you making a simple user interface for the Food Tracker app and view in simulator / phone. Below is what the end result would hopefully look like.
Below is what the end result would hopefully look like.
Xcode Swift Code: Implementing the Score and the Finish touches to the Card Game
24/10/14 22:21
Xcode Swift Code: Implementing the Score and the Finish touches to the Card Game
Today I added finishing touches to the card game. The background was changed and the score text is implemented as shown in figure 1 below.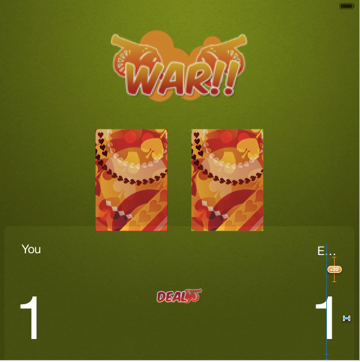
Figure 1: Adding the Player and Enemy Score Text
The next step is to implement the scoring system into the game. This is done by adding the Player and Enemy variables. What these variables do is they store the integer would be in this case the score data. This is illustrated in figure 2 below.
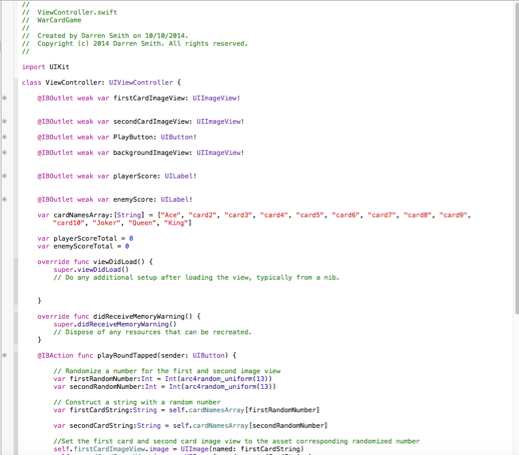
Figure 2: Enemy and Player Variables
Once the variables are added, the scoring conditions are then added into the if statement that is already created. What this condition does is if the player draws a card which is a higher value than the card that enemy has drawn, then he will score a point. However if the cards drawn are both the same then nothing happens and lastly if the enemy draws a card which is higher than the cad that the player has drawn, then he will gain a point. Below in figure 3 is the implementation of the scoring conditions and in figure 4 is the result end of the code.
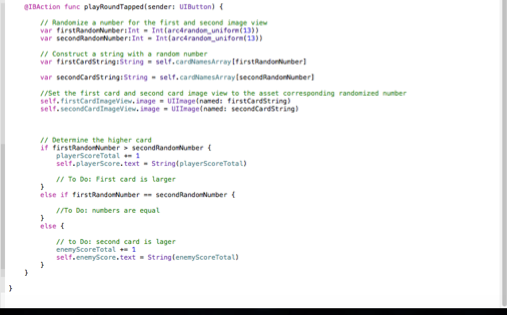
Figure 3: Setting the Scoring Conditions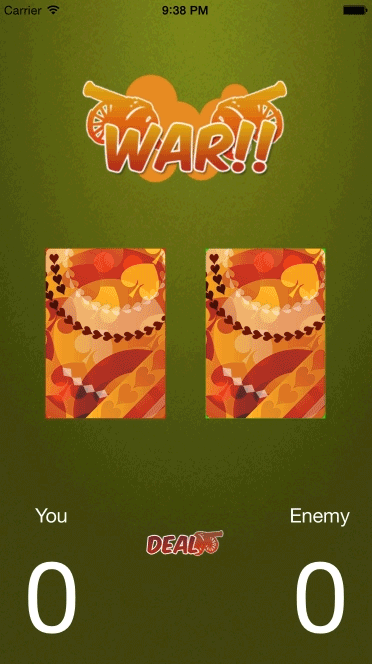
Figure 4: End Result!
Xcode Swift Code:Introduction to IF Statements
23/10/14 10:21
Xcode Swift Code:Introduction to IF Statements
Today is an introduction using IF Statements with swift code in Xcode 6. In order to learn how created use statements I went back to Xcode playground.
An if statement is a condition with multiple outcomes. In order to for the statement to work, the conditions must be made. Depending on how the condition is met will determine the outcomes. Below in figure 1 is an example of how If Statements work.
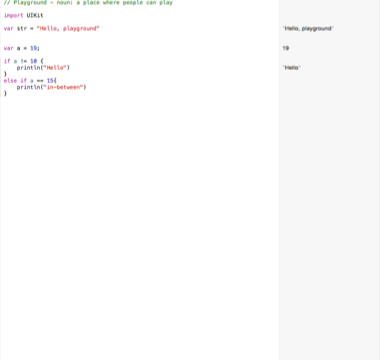
Figure 1:Experimenting the IF Conditions in Xcode Playground
Now that I understand how the function works, I head back to the card game project in Xcode 6. I then create the conditions in order to determine what will happen when the user presses the play button. Below in figure 2 is the implementation of the conditions.
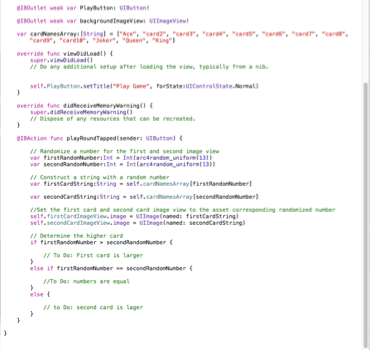
Figure 2: Implementing the IF conditions to the Card Game
The next step is to apply the scoring to the game in order to implement the set conditions.
Xcode Swift Code: Introduction to Arrays in Swift Code
19/10/14 12:19
Introduction to Arrays
Today is an introduction into Arrays in Xcode 6. In order to learn how created use arrays, I went back to Xcode playground.
An array is used to create a selection of items and array them in a category. In order do this we use the myArray[].
Below in figure 1 is an example of how arrays work.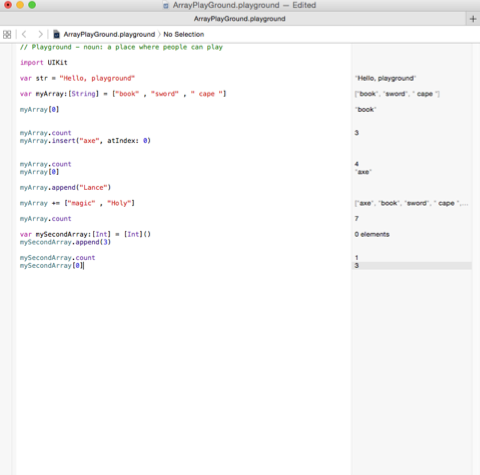
Figure 1:Experimenting with Arrays in Xcode Playground
Now that I understand how the function works, i head back to the card game project in Xcode 6. I then applied the myArray[] function for the UI Image card image underneath the IB Outlet Action button action function. Below in figure 2 is the implementation of the function to the game.
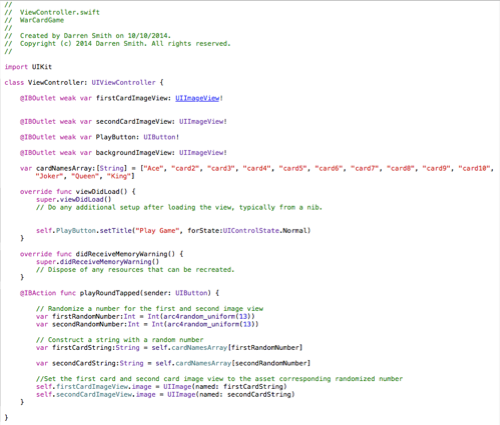
Figure 2: Implementing a Card Array that will randomise the Card Selection
Xcode Swift Code: Randomising the Cards for the Card Game
17/10/14 16:23
Randomising the Cards for the Card Game
Today I learned how to produce random numbers and change the card images when the button is pressed.
In order to learn how created random numbers, I went back to Xcode playground. In order to generate a number I used arc4random_uniform() function. What this function does is it will look for a number between ranges of 0 - the enter you give it. Below in figure 1 is an illustration of the function.
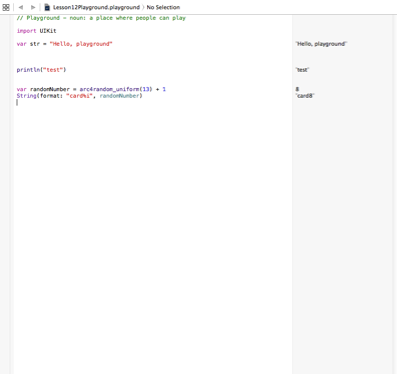
Figure 1: Using Xcode Playground to experiment the random number Class
Now that I understand how the function works, i then headed back to the card game project in Xcode 6. I then applied the arc4random() function for the UI Image card image underneath the IB Action button action function. Below in figure 2 is the implementation of the function to the game.
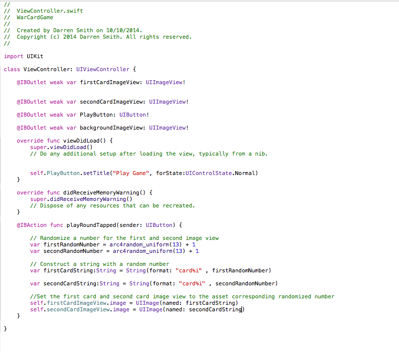
Figure 2: Implementing the random class to the Card game, so random cards will be revealed when the user presses the play button.
Once the code is implemented, the application is tested to see if random cards are revealed each time the user presses the play button. The result is shown below in figure 3.
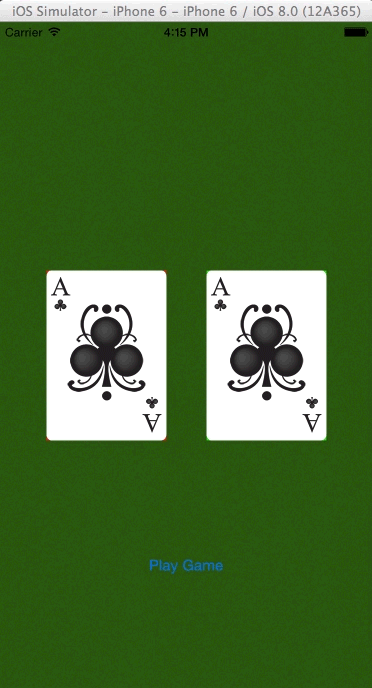
Figure 3: The End result
Xcode Switf Code: Implementing the UI Image to the Card Game
16/10/14 18:51
Implementing the UI Image to the Card Game
Today I learned how to add images to the card game project in Xcode 6 and learned about the various image sizes needed for retina and high resolution displays. Its important to have different sizes because each iPhone retina screen size are differ.
Once the images are imported into Xcode 6 image.xacassets folder (which is where the you store the images), the images can be accessed in the storyboard. Below in figure 1 we changed the card UI image from colours to the back of our card image.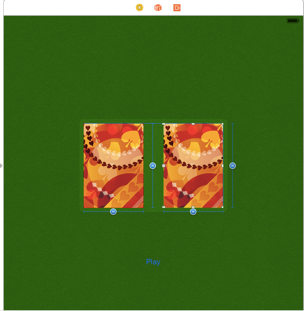
Figure 1: Implemented the back of the card to the UI Image in Xcode’ s Storyboard.
The next step is to get the user to display the cards when he presses the button. So we head to the View Controller.swift and enter the code under the IB action play button. Instead of having the name of the button changing, we will have the card image revealed by using the the self.image = UIImage code as shown below in figure 2.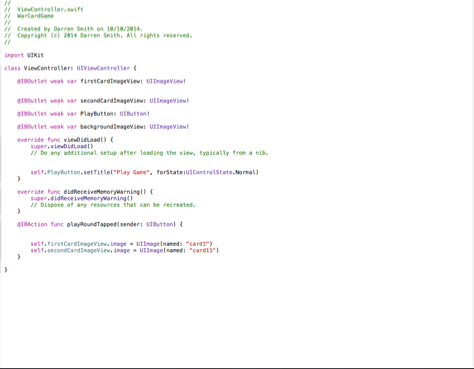
Figure 2: Implementing the code to flip the back of the card.
Once the code is created, it is time to run the program. Figure 3 shows the result.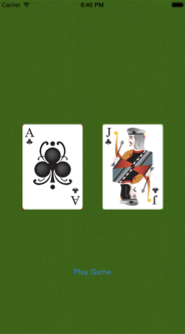
Figure 3: Revealed Cards in the game.
Xcode Swift Code: Introduction to using Classes Methods /experimenting of the Button taps
15/10/14 18:50
Introduction to using Classes Methods /experimenting of the Button taps
Before I decide to implement the UI Images, I decide to learn more about the Class Methods in Swift Code. Below in figure 1 is an experiment of using different parameters such as the .self.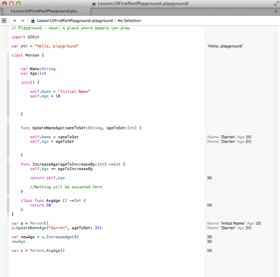
Figure1: Using Xcode Playground to learn how to use Classes in Swift Code.
After playing around with the parameters I then went back the card game in Xcode. Here i learned how to set up the parameters for the button touch. What happens is the when the user presses the play button, the text changes. Figure 2 illustrates this example below.
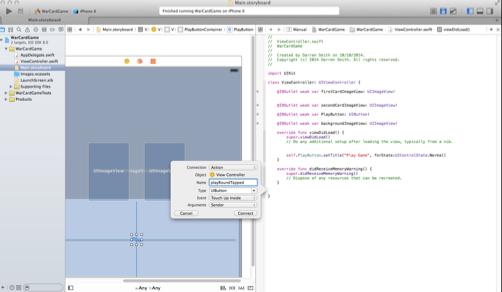
Figure 2: Using the Name Class to label the Button
Xcode Swift Code: Creating the Interface and constraints for the Card Game
10/10/14 18:44
Creating the Interface and constraints for the Card Game
Today I learned how to use auto layout in Xcode 6 in order to create the user interface for the card game.
Auto layout is very important because it allows you to resize the buttons and UI images to scale and resolution using aspect ratio. This is particular important because if you want the application to run on several iOS devices, then you need to taken into account the resolution as the screen size differs on each of the devices.
Below is an example of what the Auto Layout looks like.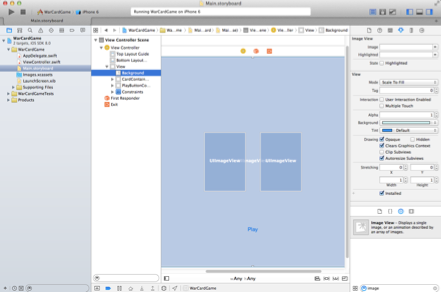
Figure 1: UI Images and the Interface Constraints
Once the Auto Layout is properly set up with its constraints, the image can be applied to the UI Images. To make sure that it is set up properly, I run the game to see what my user interface looks like. The result is shown below in Figure 2.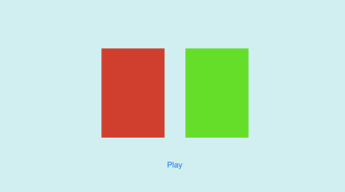
Figure 2: End result of the set up
The step is to implement the card images to my UI Image set up.
Introduction to Xcode Swift Code
10/10/14 17:53
Introduction to Swift Coding
Recently I have updated to Xcode 6. What is significant in this latest version is the introduction to a new apple programming language called Swift. Swift is an innovative programming language with an interactive work area called a playground. It will allow me to directly manipulate and experiment with Swift code live.
Xcode 6 extends the Xcode feature set with new live visualisation capabilities. For example, view debugging pauses a running app and then explodes all the UI layers into a 3D visualisation, making it easy to understand how the interface is drawn.
I will continue to use Xcode to learn how to create applications and games for apple IOS iPhone. In addition to C language and C++, I will be also dealing with swift code.
Mobile Quiz Application
23/01/14 11:44
Mobile Quiz Application
I am developing a Mobile and quiz application. The application will contain categories that are randomly generated when the user starts the application. Once the user selects the topic, the questions relating to the topic will be randomly generated from 1 to 4.
The user will be required to answer the answer, the correct answer will score them a point. But if the answer is incorrect then the user will lose a life and if the user runs out of lives its game over.
In order to create the application, the first set was to set up the categories and buttons in the Main storyboard. The buttons and labels were created using the Object library. Once they were added, the buttons and labels were then linked using the connections inspection in the view controllers as shown below.
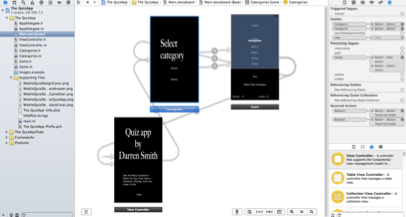
Figure 1: View controllers and its Connections inspection
After the connections are made, the game has to be coded using objective C Language. Below are the working progress of the game. More details will be added when completed.
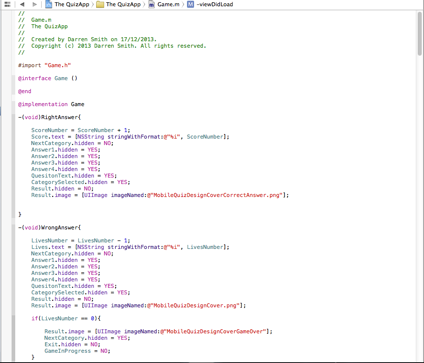
Figure 2: The Game source code so far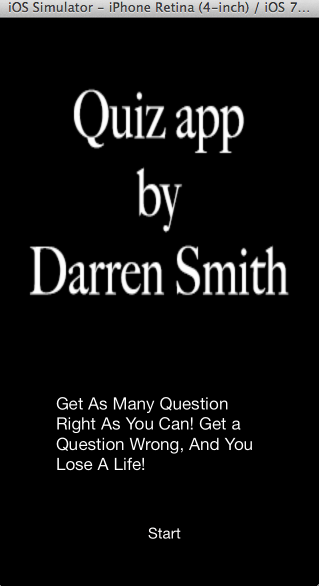
Figure 3: The game title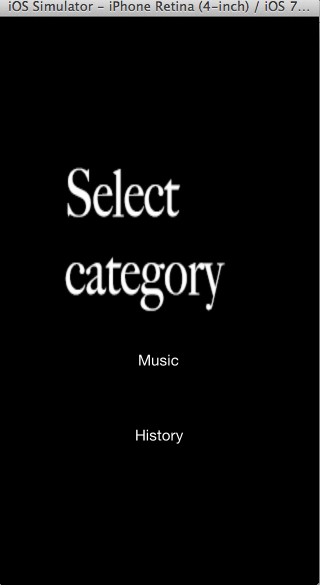
Figure 4: The game category
Introduction to Xcode
28/11/13 11:02
Introduction to Xcode
During the autumn, I recently installed a software called Xcode. Xcode is an apple developer tool kit that allows you to create games/applications for apple devices.
I will be using Xcode to learn how to create applications and games for apple IOS iPhone. The language that i will be dealing with in Xcode is C Language, which is similar to C♯.
The first application that is created, is a hello world. This introduced me to Xcode interface and got used to some of the tools that it has to offer.
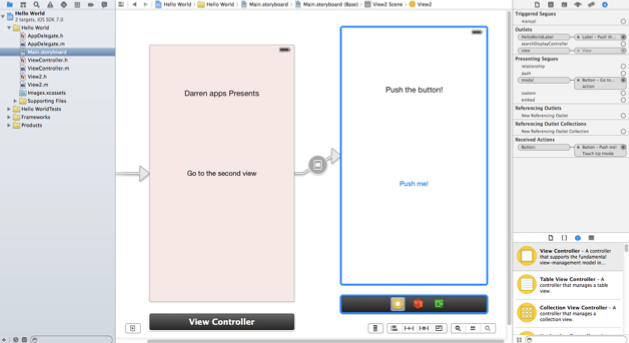
Figure 1: Xcode interface
On the image above is the workspace in Xcode. On the left side is the project directory which contains sources files, storyboard, and supporting files. The storyboard which is what is selected is shown the View Controller. The View controller is controlling what the user sees when the application is running, and is the canvas for making our users interact with the application. Below is a example of what the application looks like in simulator view.
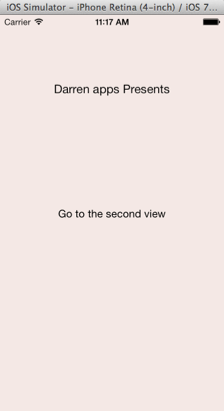
Figure 2: Application first view telling the user to go the next view
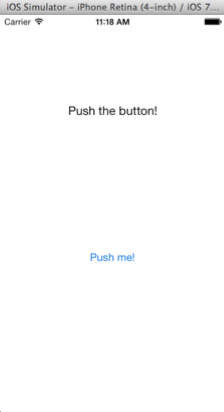
Figure 3: Application second view where the user has to click on the button.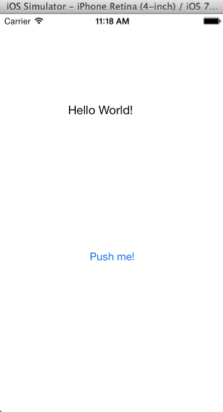
Figure 4: The end result of the Application