
Unity Techniques
Unity Animation
21/08/14 18:11
Unity Character Animation Setup
Today I have downloaded a 3D anime character model with ready made animation from Unity asset store.
However when I tried replacing the third person prefab construction worker with the new model, however i got some strange animation issues with the character.
The issues are the character animations are incorrect, motions like the character keeps jumping while running automatically instead being controlled by the keyboard. Below in figure 1, shows the example of the problem.
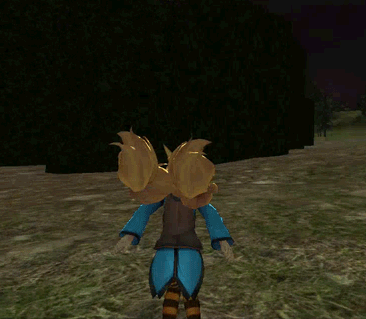
Figure 1: Character jumping test
In order to fix the problem and find the solution, I decided to learn how the character is set up.
The character animation is set up using an animation with locomotion controlling the animations for the character.
Over the next few days I am going to investigate on how to use animators and animation techniques in order to make a third person game.
Animators
In my previous third person 3D adventure game, the animation setup was different. Instead of using animators to link the motions, animations were used to link up the animations. This is called the Legacy animation system. However the animations were not perfect and rough around the edges.
So another alternative around this is to use a Mechanm animation system. Under this system it is easier to set up the animations and allows a simpler transition from one character to another. This is illustrated in figure 2 below.
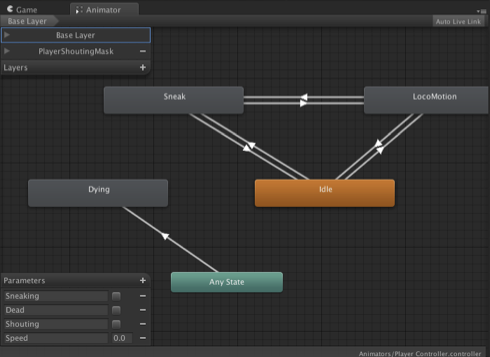
Figure 2: Mechanm animation workflow
To do this a animator is created. This allows you to link the animations using nodes and the inspector to control values and the transitions between each animation as shown in figure 3 below.
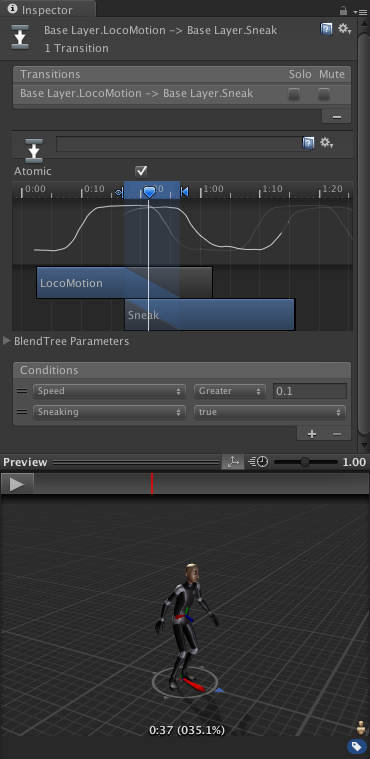
Figure 3: Animation Preview Window + Locomotion Motion graph
One you have set up the animations, you link the animation to the character and he is ready to go.
Unity Lightning Setup
05/12/13 16:01
Unity Lightning Setup
During the tutorial I learned different techniques that are used to set up the game environment. One the following techniques is the lighting.
Lighting is a vital and important because it allows the user to see the environment and bring it to life. Without lighting the environment is dark a gloomy. In previous projects, I already knew how to do lighting, but i wanted detailed lighting i need more lights and stile shadows.
However that uses up a lot of process power and slows the game down. In order light a scene efficiently, Light baking is used. Light baking is using the light maps in your scene and lighting the scene. Shown below is an example of using Light mapping for the environment in Unity 3D.
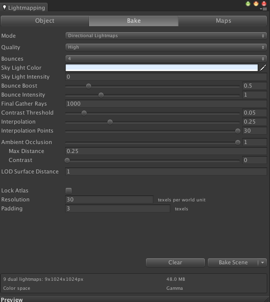
Figure 1: Light mapping option showing the baking options
In figure 1 it shows the light mapping option window. In this window you select the settings that you want the light to bake. In the light mapper window you can also see what objects and assets you selected to be light mapped.
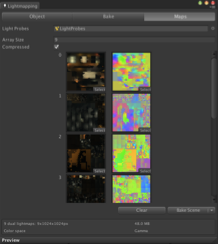
Figure 2: Light mapping option showing the selected Light maps
Figure 2 shows the light maps that you have selected and going to use in the scene.
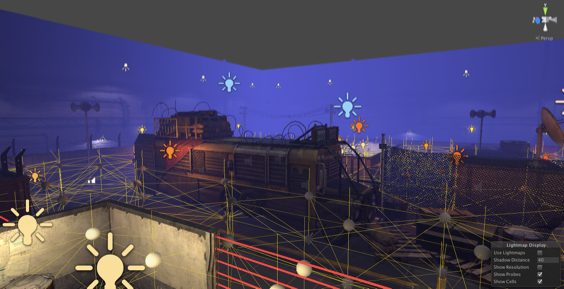
Figure 3: Lightmapped probes in the scene.
Above in figure 3 is all the light probes in the scene. This shows you the areas that are going to be baked in the scene. Once the settings are done, the scene is ready to be baked.
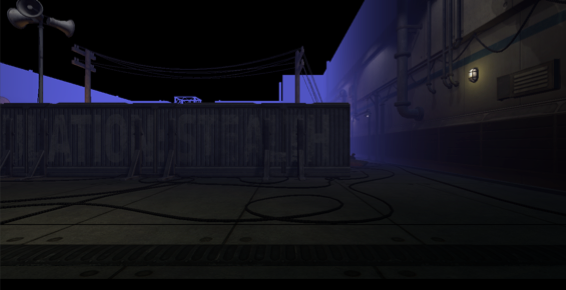
Figure 4: Non baked scene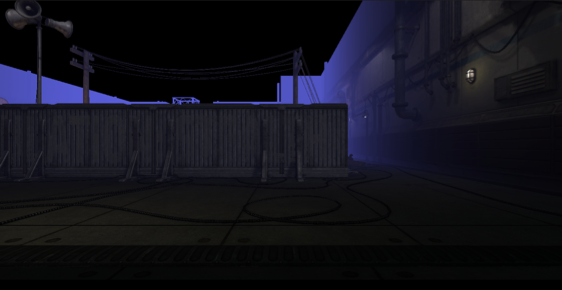
Figure 5: Baked Scene End Result
By learning how to light map the environment, it will allow to in the future to create environments and light them efficiently in order to make the game look good and detail but yet not use a lot of process power.
Unity Techniques and Findings
05/12/13 12:20
Unity Techniques / Exploration
In this blog, I will be recording any new techniques or findings from tutorials and websites.
I will be using these findings and techniques in future projects.